step-by-step: add a chatbot manually to Wordpress site with widget text (without plugin)
Add the Chatbot manually (without plugin) to your WordPress site in a few simple steps using widget text
Important: This guide is for WordPress.org sites.
The WordPress.com blogs do not allow you to embed such JavaScript code.
Notice: This method is adding a chatbot manually without Wordpress plugin. For instructions on adding the chatbot using plugin click here:
plugin guide (alternative)note: You can find your VirtualSpirits Chatbot HTML code in the control panel under 'add to website'.1. Sign in to your WordPress admin panel.
2. Select in main menu
"Appearance>Widgets"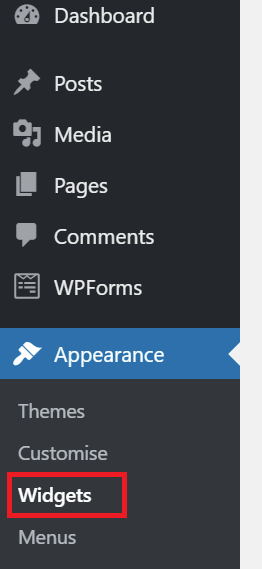
3. Choose widget
"Text : Arbitrary text or HTML" or
Custom HTML (Arbitrary HTML code)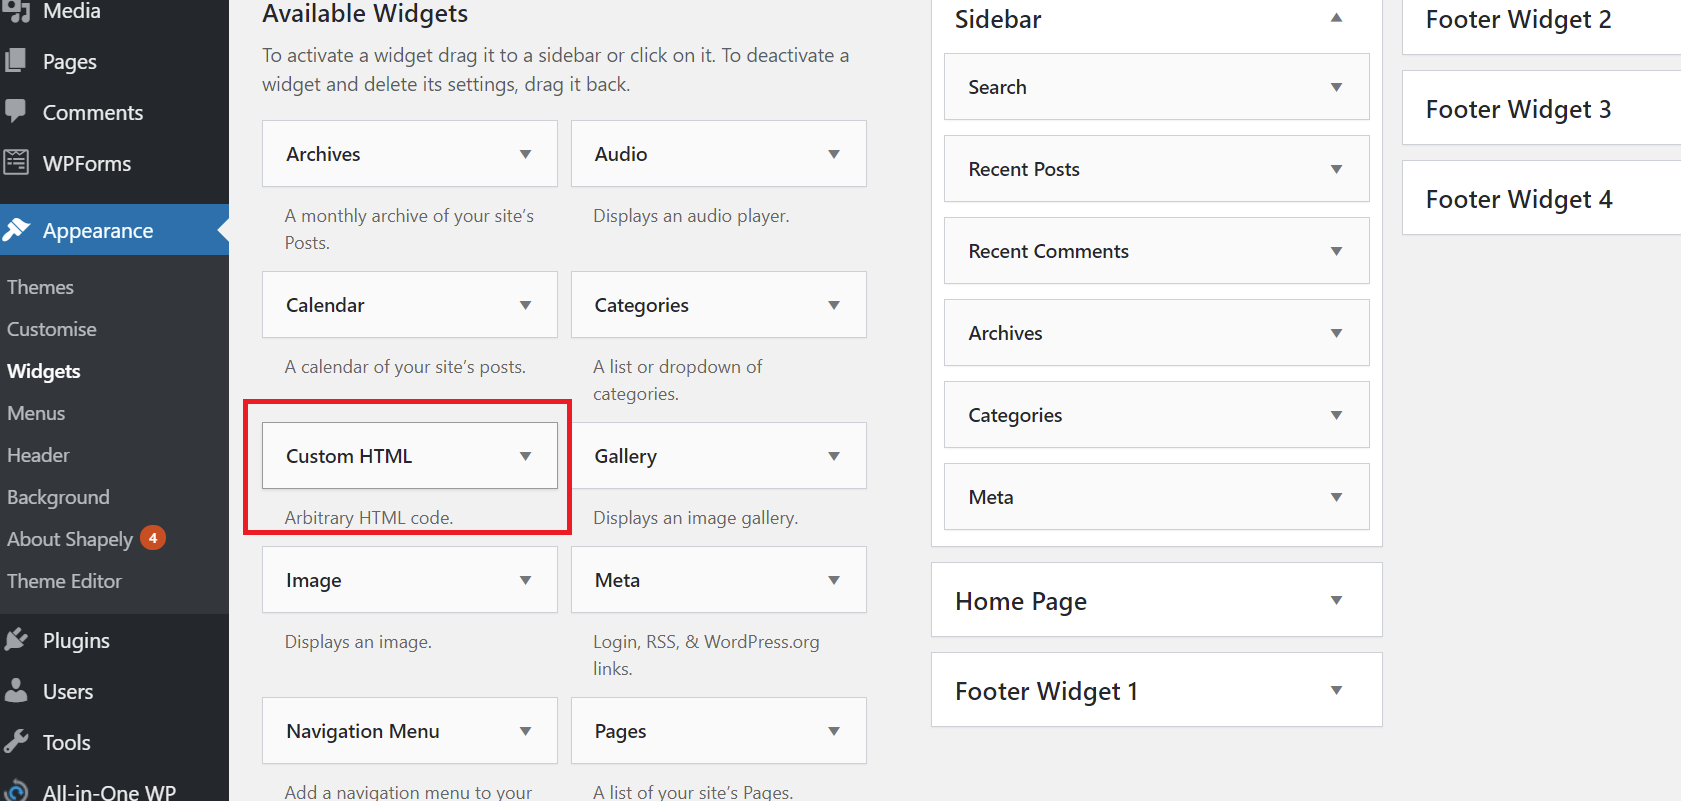
4. Add the Text Widget in any active widget area that you have, so long as it is loaded on every single page view. A
footer area may be best.
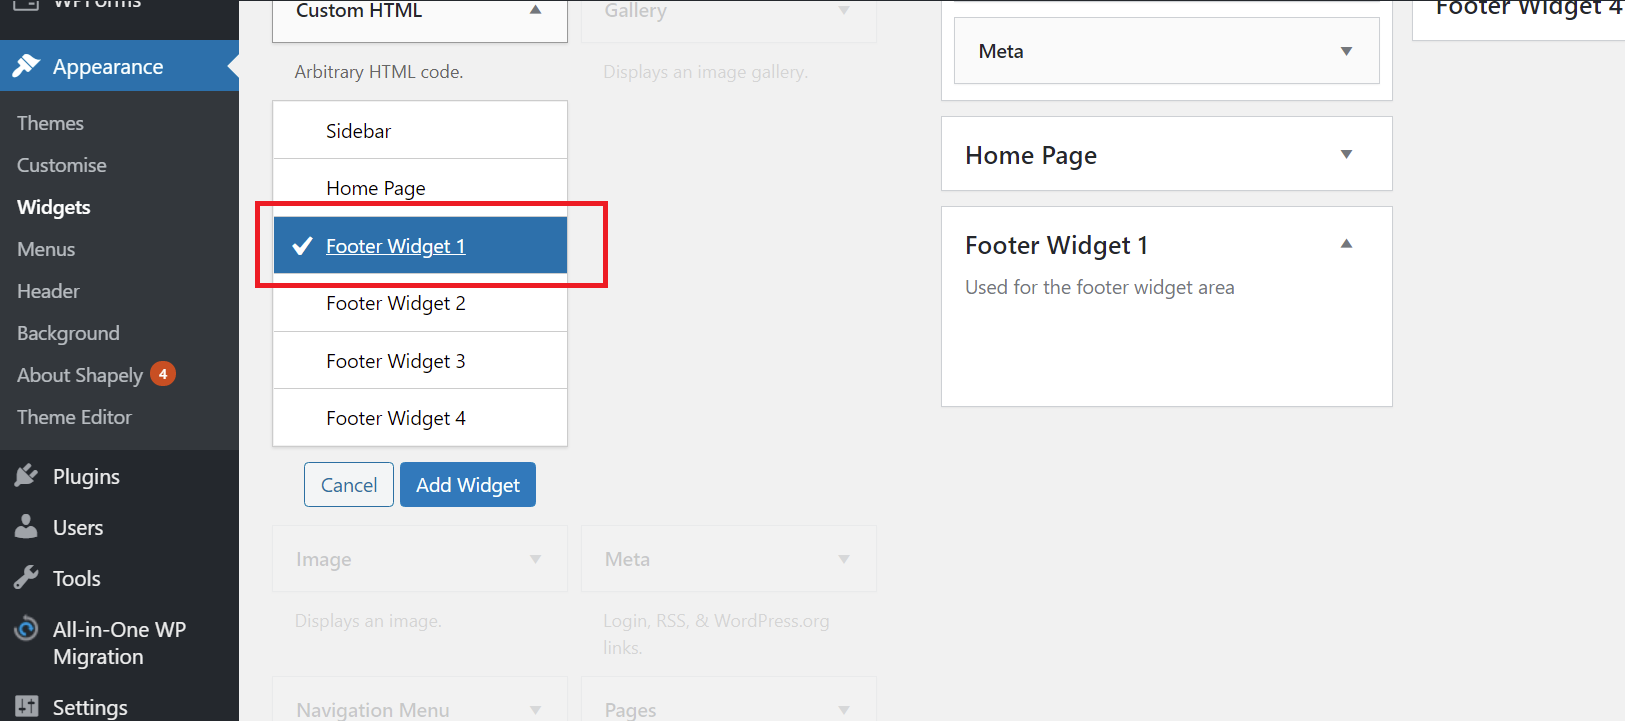
5. Copy & paste the Chatbot HTML code inside the text box, leaving the title blank.
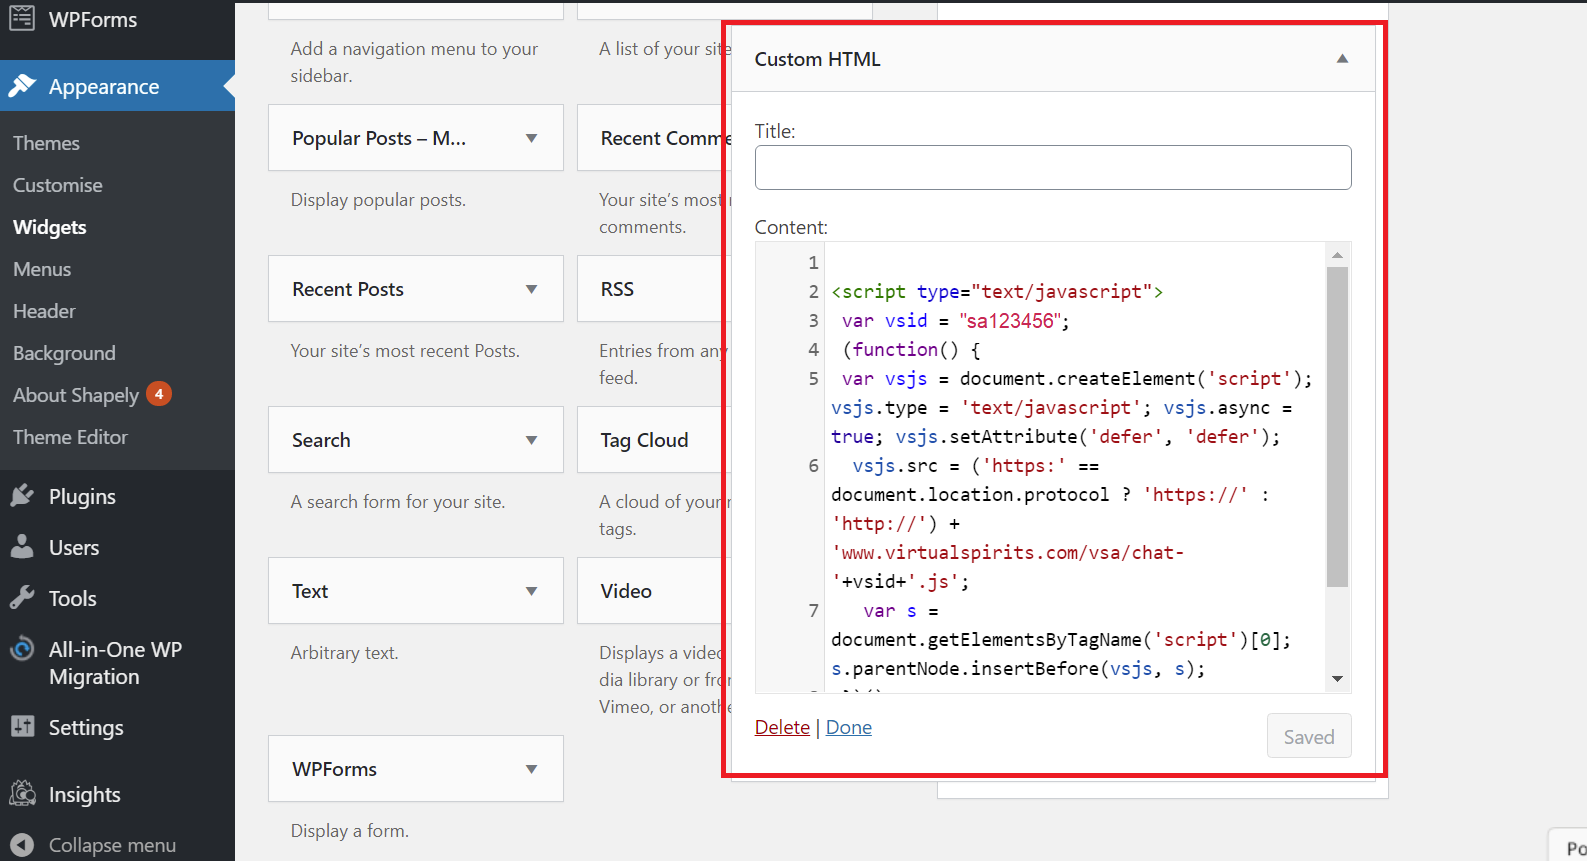
6. Press save. If the Chatbot does not appear on your website immediately, please refresh your website page